“Oh my gosh, that is actually soap?” People ask me. This is always the reaction because of how beautiful this recipe turns out to be. Making soap is not too difficult and it is much better for your skin than most store-bought soaps.
I might receive a small commission for items purchased through affiliate links in this post at no additional cost to you.
I have added links below to make it easier for you to acquire the ingredients to make it yourself.
Other soap recipes:
Things that go into soap recipes:

In my wife’s journey to making the most beautiful soaps this is the first one she made like this! I was immediately amazed at the beauty of it.
“Oh my gosh, that is actually soap?” People ask me. This is always the reaction because of how beautiful this recipe turns out to be.
It may take a steady hand but like anything else, you get better at it with time. This post is not specifically to show how to make the decorated soap but to show the potential of a simple soap recipe.
BRIEF HISTORY OF SOAP
- It is uncertain who invented soap but the oldest accounts of the production of a soap like material is around 2500 BC
- Formula for making soap has been found on sumerian tablets dating to 2500 BC
- The 3 basic components soap are fat, ash, and time.
For a more complete history and more information on soap, check out this wikipedia sight for soap!
EQUIPMENT NEEDED FOR HOMEMADE SOAP:

- Gloves
- Safety goggles or safety glasses
- Grams and ounces scale
- Plastic or stainless-steel containers
-Do not use glass or aluminum!
-Lye and aluminum when combined create a gas that is harmful to inhale.
-When lye is mixed with water in glass, it can etch the glass over time and can get so hot that it breaks that glass. - Double boiler
- Emulsion mixer
- Piping bag and tips
INGREDIENTS FOR HOMEMADE SOAP:
- 9.29 oz Water or ice
-We use ice because when lye mixes with water it creates a lot of heat.
-Ice will keep the temperature lower and help keep the mixture from boiling. As well as limit the potential for a violent reaction. - 4.58 oz Sodium Hydroxide (100% Lye)
- 6.4 oz Castor Oil
- 9.6 oz Coconut Oil
- 16 oz Lard
- 1 oz Fragrance
HOW TO MAKE HOMEMADE SOAP
Make sure that you have safety glasses and gloves on for all steps that include lye!

- Weigh out the lye into plastic container and set aside.

- Place water or ice into a larger plastic or stainless-steel container.
- Slowly pour in a few tablespoons lye and mix it in with the ice. After you have mixed it around, add a few more tablespoons of lye and mix. Do this until all the lye is mixed in and if you used ice, it will likely all melt.
- You pour in little bits at a time to avoid the mixture getting too hot at one time.

- The mixture will be a little bit cloudy at first. Mix it together until it becomes mostly clear.


- Get a double boiler ready and melt your solid fats which are lard and coconut oil.
- Melt the fat and prepare to mix the fat with the lye and water mixture.
- You are going to mix them together when they are within 10°F of each other. So, try not to heat up your fat too much so you don’t have to wait too long for you ingredients to cool down.

- After the coconut oil and lard are melted together, add in your castor oil.

- Now is the time for you to combine the lye and water mixture with the coconut oil, lard, and castor oil.
- You must mix these ingredients when they are within 10°F of each other. We try and mix them when they are right around 110°F. An ice bath may be used if you want to cool one of them down faster.
- You can mix them up to 140°F but not hotter than this. You may go colder than 110°F as long as the coconut oil and lard do not begin to solidify again.


- Using an immersion mixer, begin mixing the ingredients together.

- Mix together until the mixture becomes “trace”. Trace is a word used to describe the thickness of the mixture.
- You will know its trace when you lift the mixer out and let some of the mixture drip into the bowl. If it leaves a trace meaning it leaves a mark on the surface, then it is thick enough.

- After trace has been attained, it is time to put in fragrances and colors.
- We used cocoa powder and coffee grounds for this recipe. We did not use any special colors or scents other than these natural ones.

- To make a swirl pattern in the soap, you can mix the bowl with half of 1 color and half of another.
- As you can see above, half the soap is mixed with cocoa powder and half is mixed with coffee. This will make interesting patterns within the soap after it has been poured.

- The soap is now ready to pour.

- Here is a truffle mold which we will pour first. It will solidify and we will use the truffles to decorate the soap.

- Use a spatula to smooth out the top of the mold. Put the extra soap back in to the bowl to be reused.

- Pour the soap mix into the loaf mold.


- After the soap is poured, cover it with a piece of plastic.
- Covering the soap with plastic will reduce the amount of oxygen that hits the surface. This will help prevent soda ash.
- Soda ash will show itself as a white powder on the outside of your soap. It does not effect the soap negatively other than that it makes it look slightly less appealing. Steaming soap with soda ash will bring the color back.

- Let the soap harden for 24 hours before unmolding and cutting bars.
- After cutting the bars and unmolding the truffle soap, we made another batch of soap with no color in it to make the whipped cream top. Then using a piping bag and tip, we piped the whipped cream on top and added a truffle.
- Now you will let the soap cure for 6 weeks or around 45 days.
HOW TO CURE SOAP
- Soap needs to be cured for around 6 weeks or 45 days before using it. This process is called saponification. During this time the soap will harden and effectively turn in to soap.
- Place the soap on a rack that is open to air and lay them out with space in between the bars to allow airflow.
- You may see crystals form on the soap during this time, and you may not. This will not negatively affect the soap but it can be unsightly. These crystals can be washed off to restore the look of the soap.
HOW TO MAKE BEAUTIFUL HOMEMADE SOAP

Ingredients
- 9.29 oz Water or ice
- 4.58 oz Sodium Hydroxide (100% Lye)
- 6.4 oz Castor Oil
- 9.6 oz Coconut Oil
- 16 oz Lard
- 1 oz Fragrance
- 2 tbsp fresh or used coffee grounds (optional)
- 2 tbsp cocoa powder (optional)
Instructions
- Weigh out the lye into plastic container and set aside.
- Place water or ice into a larger plastic or stainless-steel container.
- Slowly pour in a few tablespoons lye and mix it in with the ice. After you have mixed it around, add a few more tablespoons of lye and mix. Do this until all the lye is mixed in and if you used ice, it will likely all melt.
- The mixture will be a little bit cloudy at first. Mix it together until it becomes mostly clear.
- Get a double boiler ready and melt your solid fats which are lard and coconut oil.
- Melt the fat and prepare to mix the fat with the lye and water mixture.
- You are going to mix them together when they are within 10°F of each other. So, try not to heat up your fat too much so you don't have to wait too long for you ingredients to cool down.
- After the coconut oil and lard are melted together, add in your castor oil.
- Now is the time for you to combine the lye and water mixture with the coconut oil, lard, and castor oil.
- You must mix these ingredients when they are within 10°F of each other. We try and mix them when they are right around 110°F. An ice bath may be used if you want to cool one of them down faster.
- You can mix them up to 140°F but not hotter than this. You may go colder than 110°F as long as the coconut oil and lard do not begin to solidify again.
- Using an immersion mixer, begin mixing the ingredients together.
- Mix together until the mixture becomes "trace". Trace is a word used to describe the thickness of the mixture.
- You will know its trace when you lift the mixer out and let some of the mixture drip into the bowl. If it leaves a trace meaning it leaves a mark on the surface, then it is thick enough.
- After trace has been attained, it is time to put in fragrances and colors.
- We used cocoa powder and coffee grounds for this recipe. We did not use any special colors or scents other than these natural ones.
- The soap is now ready to pour.
- Use a spatula to smooth out the top of the mold. Put the extra soap back in to the bowl to be reused.
- After the soap is poured, cover it with a piece of plastic. Covering the soap with plastic will reduce the amount of oxygen that hits the surface. This will help prevent soda ash.
Notes
- We use ice because when lye mixes with water it creates a lot of heat.
- Ice will keep the temperature lower and help keep the mixture from boiling. As well as limit the potential for a violent reaction.
- Make sure to wear your personal protective equipment. Lye can burn skin on contact and can permanently damage your sight if it gets in your eyes.
- While the soap is curing, it may form crystals on the surface of the soap. This will not negatively affect the soap but it can be unsightly. These crystals can be washed off to restore the appearance of the soap.

I like to use venison in my chili feel free to use beef. Venison Chili is a meal that you Read more

This Homemade Soap is a recipe that can be made again and again to keep your family stocked up with Read more

If you have never laid eyes on a chanterelle mushroom before, this new endeavor might be slightly intimidating to you. Read more

These Easy Fire Starters are made with common household items that you normally throw away! Just 3 materials you need Read more
I started cooking at a very young age. In middle school, my friends and their parents would ask me to cook food for them because I could make something out of nothing. I love to cook up new concoctions and see what everyone likes. When I became of working age, I started as a buss boy at a barbecue restaurant, and then moved on to work all positions of the restaurant industry. From head chef of a Jamaican restaurant in Tulsa, OK, to sous chef at a highly accredited bistro on the Oregon coast, all before I turned 21.
I Inherited land in southeast Oklahoma and now spend my days working a Fedex delivery route and working with my wife and 3 young boys on our rural homestead. We raise many different kinds of animals and some vegetable gardens. I hunt all manor of large and small game, and butcher all of my own meat. We harvest wild edibles of all kinds and enjoy to cook with them and eat them.
I am grateful that you stopped by to see how we are doing and hope to see you again very soon. We would love to be friends and hope you enjoy all of the recipes and information that I can manage to put out.
Thank you, and much love!
-Eligh
I may receive a small commission for items purchased through affiliate links in this post at no additional cost to you.
- Homemade Remedy for Arthritis: Ginger Poultice - January 21, 2025
- THE WORLD FAMOUS SMELT FISH - January 9, 2025
- GROWING CORIANDER FROM SEED - December 10, 2024

KitchenAid KSM3311XAQ Artisan Mini Series Tilt-Head Stand Mixer, 3.5 quart, Aqua Sky Blue
(as of July 10, 2026 21:18 GMT -05:00 - More infoProduct prices and availability are accurate as of the date/time indicated and are subject to change. Any price and availability information displayed on [relevant Amazon Site(s), as applicable] at the time of purchase will apply to the purchase of this product.)


KitchenAid Artisan Series 5 Quart Tilt Head Stand Mixer with Pouring Shield KSM150PS, Matcha
(as of July 10, 2026 20:03 GMT -05:00 - More infoProduct prices and availability are accurate as of the date/time indicated and are subject to change. Any price and availability information displayed on [relevant Amazon Site(s), as applicable] at the time of purchase will apply to the purchase of this product.)


Instant Pot, 6-Quart Whisper Quiet 9-in-1 Electric Pressure Cooker, Slow Rice Steamer, Sauté, Yogurt Maker, Warmer & Sterilizer, Free App with 800+ Recipes, Stainless Steel
(as of July 11, 2026 02:04 GMT -05:00 - More infoProduct prices and availability are accurate as of the date/time indicated and are subject to change. Any price and availability information displayed on [relevant Amazon Site(s), as applicable] at the time of purchase will apply to the purchase of this product.)Auto Amazon Links: No products found.


IMUSA USA Granite Molcajete Spice Grinder 6-Inch, Gray
(as of July 10, 2026 21:18 GMT -05:00 - More infoProduct prices and availability are accurate as of the date/time indicated and are subject to change. Any price and availability information displayed on [relevant Amazon Site(s), as applicable] at the time of purchase will apply to the purchase of this product.)
Nut Milk Bags, All Natural Cheesecloth Bags, 12"x12", 2 Pack, 100% Unbleached Cotton Cloth Bags for Tea/Yogurt/Juice/Wine/Soup/Herbs, Durable Washable Reusable Almond Milk Strainer(Weave 66x70)
(as of July 10, 2026 17:59 GMT -05:00 - More infoProduct prices and availability are accurate as of the date/time indicated and are subject to change. Any price and availability information displayed on [relevant Amazon Site(s), as applicable] at the time of purchase will apply to the purchase of this product.)


Genuine Handmade Mexican Mortar and Pestle Set- 8 Inches, Molcajete Mexicano — Mexican Cookware Perfect as Salsa Bowls, Guacamole Bowl and Masher, Mortero Para Cocina made from Volcanic Rock in Mexico
(as of July 10, 2026 21:42 GMT -05:00 - More infoProduct prices and availability are accurate as of the date/time indicated and are subject to change. Any price and availability information displayed on [relevant Amazon Site(s), as applicable] at the time of purchase will apply to the purchase of this product.)
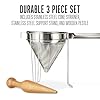
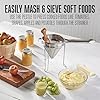
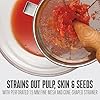
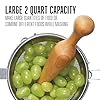

Weston Stainless Steel Cone and Pestle Set (83-3030-W), 2 Quart Capacity, Dishwasher Safe, 1.9-Liter, Silver
(as of July 10, 2026 22:27 GMT -05:00 - More infoProduct prices and availability are accurate as of the date/time indicated and are subject to change. Any price and availability information displayed on [relevant Amazon Site(s), as applicable] at the time of purchase will apply to the purchase of this product.)


Micro Ingredients Multi Collagen Peptides Powder, 1lb (41 Servings) – Hydrolyzed Type I,II,III,V,X with Biotin, Hyaluronic Acid, Vitamin C – Unflavored Collagen for Women & Men, Easy Dissolve
(as of July 10, 2026 18:54 GMT -05:00 - More infoProduct prices and availability are accurate as of the date/time indicated and are subject to change. Any price and availability information displayed on [relevant Amazon Site(s), as applicable] at the time of purchase will apply to the purchase of this product.)