Banana Rum Ice Cream is a special twist on my simple childhood favorite Banana Ice Cream. Using ingredients like heavy cream, egg yolks, rum, and vanilla, this ice cream is sure to give you the rich homemade ice cream experience you hoped for.
Other Homemade Dairy Recipes To Try!

HOMEMADE BANANA RUM ICE CREAM AS A WHOLE
As a childhood tradition, my grandmother and I would make banana ice cream every time I would visit her in the summer time. Homemade banana ice cream was such a treat in the Oklahoma summer heat. To this day banana ice cream is my favorite kind of ice cream.
Fast forward, Im an adult now! With a food blog and stuff! So I decided to have grandma over to the house and I also decided to roast the bananas and add some Bicardi because I’m I am an adult now, with a food blog!
The experience was absolutely outstanding. The ice cream turned out wonderful, and most importantly, a family tradition was continued on to the next generation!
I must admit! You are supposed to use extra ripe and extra bruised bananas for ice cream due to the richness and sugariness of brown bananas. However, I didn’t have any! So I decided to make a positive out of a negative and roast the bananas to concentrate and enhance the overall flavor profile.
EQUIPMENT NEEDED FOR BANANA RUM ICE CREAM
- Ice Cream Maker
- Spatula Set
- Mixing Bowls
- Knife
- Measuring cups and measuring spoons
- Baking sheet
- Parchment paper
- Blender or Immersion mixer
INGREDIENTS NEEDED
HOW TO MAKE ROASTED BANANA RUM ICE CREAM
I might receive a small commission for items purchased through affiliate links in this post at no additional cost to you.

- This recipe goes full bore with whole milk, heavy whipping cream, fresh eggs, and enough sugar to satisfy.

- Begin by roasting the bananas!
- To do this we will wash the outside of the banana with soap and water to get any foreign particles or pesticides off of the bananas.

- Lay the bananas out on a sheet pan lined with parchment paper.
- Make sure to leave some space in between the bananas to allow them to roast evenly.

- Roast the bananas at 300° for 15-30 minutes. They are ready when the skin is black and shiny.
- Allow them to cool while you get the rest of your ice cream put together.
- Pro Tip: You can roast the bananas the day advance to save yourself trouble on the big day! Just make sure to place them in the refrigerator to ensure they don’t rot.

- Next we will make the custard! Create an ice bath with a large bowl full of ice water and a medium bowl to set in the ice water.
- Pour the heavy whipping cream in the medium bowl and set it aside.

- I had to include some pics of my grandmothers hands working as they have for many years.
- We have made this recipe together for years and this was a wonderful reunion as always.

- Separate the yolks from the whites and set the yolks aside in a bowl.

- In a medium saucepan over medium heat add all of the milk, sugar and salt.
- Heat up the mixture while stirring frequently until you see bubbles around the edges. Be careful not to boil the milk mixture.

- Tempering the eggs is a process which cooks the egg yolks without scrambling them and keeping them creamy in the process.
- Using a ladle or measuring cup, add small amounts of the heated milk mixture to the yolks while stirring vigorously with a whisk to keep parts of the yolks from getting too hot. Continue this process until you have added half of the heated milk mixture to the egg yolks while whisking.
- You want to distribute the hot liquid throughout the yolks as quickly as possible to gradually bring up the temperature of the yolks. This will cook them without allowing the proteins to bind and make scrambled eggs.

- Add the tempered egg yolk mixture back into the saucepan and cook on medium heat, stirring and scraping the bottom of the pan frequently to ensure the custard does not stick to the pan.
- Heat the mixture until it is thick enough to coat the back of a wooden spoon.

- Place a strainer over the chilled heavy whipping cream.

- Pour the custard through the strainer and in to the chilled heavy whipping cream.
- This will strain out any solids in the custard and ensure a silky smooth ice cream.


- Peel the bananas, place them in a bowl or blender, pour half of the custard into the bananas, and blend.
- I like to use an immersion mixer for this job but a blender works just as great if not better.


- Pour the custard and banana blend back into the rest of the chilling custard in the ice bath!
- Next mix in the rum and your vanilla extract. Rum will lower the freezing temperature of the ice cream and allow the ice cream to be softer and easier to scoop from the freezer.

- Cover the ice cream mixture and place in the fridge for at least 4 hours but overnight is great and convenient.
- Pro Tip: You can do this a day in advance and have the ice cream mixture ready to go in the ice cream maker the next day!

- Pour the ice cream mixture into the ice cream maker, ensuring that you don’t fill it over the fill line and place the lid on!

- Using your grandmothers ice cream maker, place the chamber in the ice cream maker and fill the gaps with ice and salt. Per the manufactures suggestion of course.
- Allow the ice cream maker to work until it is rotating slowly but you don’t want the ice cream maker to continue to run after it stops.
- Ice cream in an ice cream maker can freeze to the point where the ice cream maker won’t rotate anymore and you can burn out the motor on your ice cream maker if you are not careful!
RECIPE TIPS AND VARIATIONS


- You can add a variety of ingredients or toppings to the ice cream. I chopped up pistachios for this recipe!
- Other toppings you could add to the top could include but are not limited to sliced strawberries, chocolate, honey, pistachio cream, chopped bananas, caramel, sea salt and much more!
Homemade Roasted Banana Rum Ice Cream

Homemade Roasted Banana Rum Ice Cream is a special twist on my simple childhood favorite Banana Ice Cream. Using ingredients like heavy cream, egg yolks, rum, and vanilla, this ice cream is sure to give you the rich homemade ice cream experience you hoped for.
Ingredients
- 2 cups of heavy cream
- 5 egg yolks
- 1 cup of whole milk
- 2/3 cup of sugar
- 1/4 teaspoon of salt
- 3 bananas
- 1 tbsp of vanilla extract
- 1 tbsp of rum, light or dark will work
- 1/4 cup of chopped pistachios (Optional)
Instructions
- Wash and dry your bananas and place them separately on a baking sheet, roast them in the oven at 300°F for 15-30 minutes or until the skin is shiny and black.
- Create a ice water bath by putting ice and water in a large bowl and a medium bowl inside of the ice water. Pour heavy whipping cream into the bowl. Separate egg yolks, place them in a bowl and set it aside for later.
- Combine milk, sugar, and salt in a medium saucepan and begin heating it over medium heat, stirring occasionally until bubbles form around the outsides. Avoid boiling the milk in this process.
- Temper the egg yolks by pouring about half a cup at a time of heated milk mixture and add it to the yolks, stirring rapidly to distribute the heat through the yolks quickly. Keep going until half of the milk mixture has been whisked into the yolks.
- Pour the custard back into the saucepan and cook it on low heat, stirring frequently and scraping the bottom of the pan with a wooden spoon. Cook the custard until it is thick enough to coat the back of a wooden spoon.
- Strain the custard into the chilling heavy whipping cream. Pour half of this mixture with your peeled bananas and blend it up. You can use a blender or a bowl with an immersion mixer. Blend it up until smooth and then pour it back into the ice bath.
- Now you may stir in the vanilla extract and the rum. Cover the banana ice cream mixture with plastic wrap and place it in the fridge to chill for at least 4 hours, but overnight is great!
- Using the manufactures recommendation for use, put your mixture in the ice cream maker and allow it to churn until the ice cream is done. Your ice cream maker may slow down due to the thickness of the ice cream, this can indicate when its ready. Put the ice cream in an air tight container in the freezer and it will stay good for up to 3 months.
Notes
You may skip the step of roasting the bananas and just use very ripe bananas! But make sure they are very ripe so they add a rich banana flavor to the ice cream.
Light or dark rum will work. It will add a slightly rummy flavor to the ice cream and lower the freezing point of the ice cream so it sets softer in the freezer, making it easier to scoop and more pleasant to eat.
The additions to this ice cream are basically limitless! If the ingredient you are adding is small, for example like chopped pistachios, you may add it before it goes in the ice cream maker. If the ingredient is large, for example like large chocolate chunks then you will want to add these ingredients about 5 minutes before you plan to take it out of the ice cream maker, this will evenly distribute the ingredient without burning out your ice cream maker.
Nutrition Information:
Yield:
8Serving Size:
1/2 cupAmount Per Serving: Calories: 137Total Fat: 7gSaturated Fat: 4.5gCholesterol: 29mgSodium: 53mgCarbohydrates: 16gFiber: .5gSugar: 14gProtein: 2.3g

Potato Cakes made with the Wild Onion, will keep you waiting for spring to come. Potato Cakes are an old Read more

Curry carrots is a very simple dish, but is one of the absolute best carrot recipes you could ever ask Read more

Oh, Blueberries N' Cream! How I love Blueberries N' Cream! This dish is one of those simple dishes that just, Read more

Vanilla Ice Cream with Espresso Affogato is a perfect dessert! But it is one that you might only want to Read more
I started cooking at a very young age. In middle school, my friends and their parents would ask me to cook food for them because I could make something out of nothing. I love to cook up new concoctions and see what everyone likes. When I became of working age, I started as a buss boy at a barbecue restaurant, and then moved on to work all positions of the restaurant industry. From head chef of a Jamaican restaurant in Tulsa, OK, to sous chef at a highly accredited bistro on the Oregon coast, all before I turned 21.
I Inherited land in southeast Oklahoma and now spend my days working a Fedex delivery route and working with my wife and 3 young boys on our rural homestead. We raise many different kinds of animals and some vegetable gardens. I hunt all manor of large and small game, and butcher all of my own meat. We harvest wild edibles of all kinds and enjoy to cook with them and eat them.
I am grateful that you stopped by to see how we are doing and hope to see you again very soon. We would love to be friends and hope you enjoy all of the recipes and information that I can manage to put out.
Thank you, and much love!
-Eligh
I may receive a small commission for items purchased through affiliate links in this post at no additional cost to you.
- Homemade Remedy for Arthritis: Ginger Poultice - January 21, 2025
- THE WORLD FAMOUS SMELT FISH - January 9, 2025
- GROWING CORIANDER FROM SEED - December 10, 2024

KitchenAid KSM3311XAQ Artisan Mini Series Tilt-Head Stand Mixer, 3.5 quart, Aqua Sky Blue
(as of April 3, 2026 03:04 GMT -05:00 - More infoProduct prices and availability are accurate as of the date/time indicated and are subject to change. Any price and availability information displayed on [relevant Amazon Site(s), as applicable] at the time of purchase will apply to the purchase of this product.)


KitchenAid Artisan Series 5 Quart Tilt Head Stand Mixer with Pouring Shield KSM150PS, Matcha
(as of April 2, 2026 17:27 GMT -05:00 - More infoProduct prices and availability are accurate as of the date/time indicated and are subject to change. Any price and availability information displayed on [relevant Amazon Site(s), as applicable] at the time of purchase will apply to the purchase of this product.)


Instant Pot, 6-Quart Whisper Quiet 9-in-1 Electric Pressure Cooker, Slow Rice Steamer, Sauté, Yogurt Maker, Warmer & Sterilizer, Free App with 800+ Recipes, Stainless Steel
(as of April 3, 2026 02:21 GMT -05:00 - More infoProduct prices and availability are accurate as of the date/time indicated and are subject to change. Any price and availability information displayed on [relevant Amazon Site(s), as applicable] at the time of purchase will apply to the purchase of this product.)Auto Amazon Links: No products found.


IMUSA USA Granite Molcajete Spice Grinder 6-Inch, Gray
(as of April 2, 2026 18:04 GMT -05:00 - More infoProduct prices and availability are accurate as of the date/time indicated and are subject to change. Any price and availability information displayed on [relevant Amazon Site(s), as applicable] at the time of purchase will apply to the purchase of this product.)
Nut Milk Bags, All Natural Cheesecloth Bags, 12"x12", 2 Pack, 100% Unbleached Cotton Cloth Bags for Tea/Yogurt/Juice/Wine/Soup/Herbs, Durable Washable Reusable Almond Milk Strainer(Weave 66x70)
(as of April 2, 2026 20:59 GMT -05:00 - More infoProduct prices and availability are accurate as of the date/time indicated and are subject to change. Any price and availability information displayed on [relevant Amazon Site(s), as applicable] at the time of purchase will apply to the purchase of this product.)


Genuine Handmade Mexican Mortar and Pestle Set- 8 Inches, Molcajete Mexicano — Mexican Cookware Perfect as Salsa Bowls, Guacamole Bowl and Masher, Mortero Para Cocina made from Volcanic Rock in Mexico
(as of April 2, 2026 18:28 GMT -05:00 - More infoProduct prices and availability are accurate as of the date/time indicated and are subject to change. Any price and availability information displayed on [relevant Amazon Site(s), as applicable] at the time of purchase will apply to the purchase of this product.)
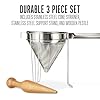
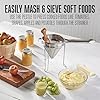
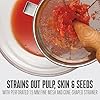
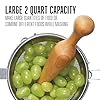

Weston Stainless Steel Cone and Pestle Set (83-3030-W), 2 Quart Capacity, Dishwasher Safe, 1.9-Liter, Silver
(as of April 2, 2026 19:52 GMT -05:00 - More infoProduct prices and availability are accurate as of the date/time indicated and are subject to change. Any price and availability information displayed on [relevant Amazon Site(s), as applicable] at the time of purchase will apply to the purchase of this product.)


Micro Ingredients Multi Collagen Peptides Powder, 1lb – Hydrolyzed Type I,II,III,V,X with Biotin, Hyaluronic Acid, Vitamin C – Unflavored Collagen for Women & Men, Easy Dissolve, 41 Servings
(as of April 2, 2026 15:30 GMT -05:00 - More infoProduct prices and availability are accurate as of the date/time indicated and are subject to change. Any price and availability information displayed on [relevant Amazon Site(s), as applicable] at the time of purchase will apply to the purchase of this product.)