When it comes to planting fruit trees I hear more horror stories than success stories. But, it does not have to be that way! Following a few simple steps you can give your fruit tree a high chance of success!
I might receive a small commission for items purchased through affiliate links in this post at no additional cost to you.
The best time to plant a tree was 20 years ago. The second best time is now.
Chinese Proverb
If you are a visual learner check out my video on HOW TO PLANT A FRUIT TREE!

I have had a lot of successes but far more failures planting fruit trees. Luckily we have the ability to learn from our mistakes!
When reading my homesteading book and bearing in mind my failures, this is the method I have found that is best for me. Hopefully it will be the best for you as well.

THINGS TO CONSIDER WHEN PICKING A SPOT FOR A FRUIT TREE
Before we start digging in too deep, consider a few things first:
- Will the spot get enough sunlight? Most fruit trees like full sun which is 6+ hours of sunlight per day.
- Is it close to anything that could damage it or inhibit its growth? i.e. Other trees too close, roofs that could drop snow and break branches, a vegetable garden that could compete for nutrients.
- Is this a high spot that dries out? Or a a low spot that floods often? Either of which could be less than ideal for a fruit tree.
- If you mow your lawn, is there enough space around the tree for me to fit my mower in between? I plant fruit trees near established structures on my property and I need to make sure I can fit my mower everywhere around the tree.
- Will I be aesthetically pleased with a full grown tree in this spot? Will it block your view of something that you like looking at? Is there something around the tree that you do not want fruit falling and rotting on?
- Perhaps less importantly: Is this a place that I could willingly keep watered through the hot months? If you live in an extremely hot climate like we do in Oklahoma. Dragging the hose across the yard or carrying a bucket of water from the pond can be a difficult task at times! I have had a few trees die because they were not in a convenient spot and I just forgot to water them.
HOW TO PLANT A FRUIT TREE

- Begin by digging a hole that is twice as wide and the same depth as the pot that your tree comes in. If the pot is 12″ then dig the hole 24″ wide. If the pot is 12″ deep, dig the hole 12″ deep.
- Put the dirt on the lower elevation side of the tree. More on this later. To make it easier to put the dirt back in the hole and keep a clean area, you can scoop the dirt onto a tarp or a board.
- Break up large clumps of dirt with the shovel after you dig them out of the hole.


- Now place the potted tree in the hole to check that the depth is correct. You want the level of soil in the potted tree to be the same as the native soil so that the tree is flush with the ground. You do not want the graft to be buried, so make sure the grafting location is above the soil.
- At times the soil level in the pot will be incorrect coming from the nursery. Dig down a little in your pot to see that the first roots are just beneath the soil. You don’t want exposed roots and you don’t want the trunk of your tree to be buried or it may rot and kill the tree.
- Using a stick or a pole you can compare soil levels easily. I usually do it with the naked eye but it can be useful to use a something to double check.


- I like to kneel down near the tree and place the pot on my knee. Tipping the pot over the hole so that any dirt falling out of the pot falls into the hole.
- Compress the pot with your hand to loosen the root ball. Then gently pull the tree out from the base of the trunk. Being careful not to pull too hard and damage the roots around the trunk.

- This tree like many other potted trees from the nursery is very root bound. If you want to see how to fix this, check out How To Root-Prune Rootbound Potted Trees.
- I am not cutting or sawing any roots here. I simply loosen soil on the bottom of the root ball and loosen the sides a little bit before putting it in the hole.
- Be careful not to damage too many of the roots. This could stun your tree and cause it to have a slow start or even kill the tree.

- Place the root ball in the hole and double check that the depth is still good.
- Next, orient the tree so that the lowest limb is facing the southwest. As this limb grows it will shade the trunk of the tree and lessen the risk for sun scald.
- If there are high winds in your area or you know which direction the highest wind comes from. Tilt the tree slightly in that direction to reduce the risk of your tree blowing over in the wind.

- Once the tree is in the correct position. Begin filling in the are around the root ball with soil.

- Fill it to a few inches below the soil line to form a trough to pour water in to.

- Now, pour water in the trough to settle the soil around the roots.

- When the trough is full of water, bump and shimmy the root ball around a little bit to let water and soil to settle underneath and around the roots.
- You will begin to see air bubbles popping up around the root ball. This is a good thing! You want to get all of those air pockets out.
- The oxygen in the air pockets can burn the roots of your tree. The water will cause the soil to settle around the root ball so it is all nice and tight and the tree is set in place.

- Now fill the hole in the rest of the way with soil. This loose, muddy soil will settle in the following days after planting the tree. Make sure you check it to make sure that there are no deep holes around the tree.
- If deep holes form around the tree from the soil settling, quickly fill them in to prevent the roots from being damaged due to exposure to the air and the sun.

- Now smooth the dirt out so that it is flush with the original soil line.

- Remember how we put the soil on the lower elevation side of the tree? Now using that soil, form a catch basin about 2 feet away from the trunk.
- This catch basin will form a dam which will catch and hold water so your newly planted tree can get a good, deep watering.


- Give it one more good watering now that everything is where it is going to stay.
- As you can see the catch basin works like a charm! Catching and holding water for the tree.

- Finally, put a good layer of mulch all around the tree and the basin. The mulch serves many functions!
- Mulch will help prevent weeds from growing around the young tree and competing for nutrients and water. It will also hold moisture better so the soil around the tree doesn’t dry out so quickly.
- We like to use leaf mold to mulch our trees. Which will encourage worms and beneficial fungi to break down the organic material and feed the tree over a long period of time.

- Make sure that the mulch does not come within at least a few inches of the trunk or it could cause it to rot!

- Last but not least, clean up after yourself and your work area. There is nothing like finishing a project but not really finishing it and leaving buckets and tools out.
- Be proud of the area and treat it well by picking up after yourself and making the area around your new food tree as seamless as possible.
HOW TO FERTILIZE A NEW FRUIT TREE
- When planting the new tree, you can add some bone meal fertilizer into the hole to encourage good root development.
- If you live in an area with good soil, it may not be necessary to fertilize your fruit tree at all. You can fertilize 1 week and 1 month after planting to help the tree get established if you please.
- If you fertilize your young tree too much it can prevent your fruit tree from growing a good root mass because the roots will not go out in search of new ground.
- If your new fruit tree does not do well after 2-3 years, give it fertilizer.
- After your tree starts to produce fruit, you may want to fertilize it with high potassium fertilizer when it is producing fruit, and high nitrogen fertilizer after that to encourage good growth.
HOW LONG WILL IT TAKE FOR A FRUIT TREE TO PRODUCE?
- It depends on the variety of tree you are planting. Dwarf apple trees can take just 2-3 years to produce fruit while a full size apple tree can take up to 8 years to produce.
- I have plum trees that were 3-4 years old when I planted them, they may produce fruit in the first or second year where I have almond trees that could take 5-12 years to produce.
- Research the variety of tree you are planting and see if that works with your time frame.
- There is an old saying that says, “The best time to plant a fruit tree is 20 years ago. The second best time to plant a fruit tree is now”
HOW MUCH TO WATER A NEW FRUIT TREE
Watering a newly planted fruit tree is one of the most crucial steps to determine if your fruit tree will be successful or not. There are a lot of technical ways of watering a new fruit tree but we will keep it simple here.
- Water about a bucket worth of water a week after planting. If it rains, then reduce this amount accordingly.
- During the month of august, you may water them one bucket full every 2-3 days to keep them happy.
- If the leaves on the tree are getting wilted, curling, or turning brown on the tips. This could be a sign that your fruit tree is not getting enough water.
The time of year to plant fruit trees is just about the same time of year to pick wild mushrooms. Check out How To Identify Chanterelle Mushrooms. For another very common edible mushroom that is easy to identify, See How To Identify Shaggy Mane Mushrooms.
HOW TO PLANT A FRUIT TREE

When it comes to planting fruit trees I hear more horror stories than success stories. But, it does not have to be that way! Following a few simple steps you can give your fruit tree a high chance of success!
Materials
- Water
- Mulch
- Compost (optional)
- Pick axe for tough roots (optional)
Tools
- Shovel
- Buckets for water or mulch (optional)
- Wheelbarrow (optional)
Instructions
- Dig a hole twice as wide as the pot that your tree is in. Add any soil amendments like compost in the hole and in the dirt that came out of the hole.
- Level the bottom of the hole so that the soil level of the pot and the ground around it is the same level. Check by putting the potted tree in the hole and then adjusting the depth before taking the tree out of the pot.
- Take the tree out of the pot and place it in the hole and double check the depth. Orient the tree so that the lowest branch on the tree faces the southwest. If this is a windy sight or you know what direction the strongest winds come from, tilt the tree slightly in that direction.
- Fill in the area around the root ball with soil until it is a few inches under the original soil line.
- Pour water into the area around the newly potted tree. Move the root ball around so that the water and dirt can settle all around the newly planted root ball. You will see bubbles coming up around the root ball to indicate the soil settling and the air is getting out.
- Now fill the soil in all the way until the ground is level again.
- Form a catch basin around the fruit tree to catch water for the tree. This will be a crescent shaped dam on the lower elevation side of the tree.
- Now water the new tree with about half a bucket of water and check to see that your water catchment system has worked. If you need to repair your water basin so that it holds water better, then do so.
- Mulch the area around the tree and mulch the catch basin. Be careful to keep the mulch around 4 inches from the trunk of the tree.
- Make sure the area around the tree is kept free of weeds for at least the first year. Mulch will help prevent the weeds from coming up and competing for water and nutrients. Water the tree about a bucket of water a week through summer. The following year may need slightly less and the 3rd year your fruit tree should be self sufficient.
Notes
- Don't add a huge amount of fertilizer to the hole when you plant the tree. Also, you don't need to dig a big giant hole and change the soil composition too much. The tree needs to get used to living in your native soil. So a little hole with little amendment will do for planting a new tree.
- Sometimes the soil level in a fruit tree is wrong when it comes from the nursery. Make sure that the highest root is just under the surface of the soil. The nursery I get my fruit trees from is good about making sure they are at the right level coming from the nursery.
- You can use a stick to lay across the hole to make sure the tree is buried at the right depth. Putting the lowest branch toward the southwest will help prevent the tree from suffering sun scald. This lowest branch will grow larger and will help shade the trunk of the tree.
- Make sure that the soil line is below the grafting location of the tree.
- Getting all off the air bubbles out at the beginning is a very important step. Not only does it get all of the oxygen out which can burn roots. But it will also allow the soil to settle around the root ball to make sure that everything in the hole is nice and tight.
- After the next few days you may see soil settle round the fruit tree where it was a little loose. Make sure you check for this and fill in any holes around the fruit tree that you see.
- A newly planted fruit tree needs as much water as it can get to get established. The catch basin will make it so when it rains, it catches extra water and can water your fruit tree more volume of water, and for a longer period of time.
- In total through the process of planting a new tree, you should use about a 5 gallon bucket full of water. Make sure the catchment system works well.
- Mulching the area around the tree and the catch basin is very good for your tree. This mulch will slowly break down over time and will feed your tree. It will encourage worms to move around your tree and they will leaving castings which also feed your tree. The mulch will prevent weeds from growing and will help retain more water for the tree to use.
- Weeds will compete with a newly planted fruit tree for water and nutrients. Keep the area clear of weeds. The watering of the new fruit tree depends on the location and the climate of your area. If you get lots of rain, you don't have to water nearly as much. If you live in a very dry climate, you may need to water 1-3 times a week. Just pay attention to your trees and give them what they need.

I like to use venison in my chili feel free to use beef. Venison Chili is a meal that you Read more

Did you know that you need to trim a goats hooves on a regular basis? I've been trimming goat hooves Read more

Here you will read all you need to know about harvest and preparing corn. As a beginner I was really Read more

Blueberry Creamed Honey is a way we transform honey into something that has added benefits and flavors with none of Read more
I started cooking at a very young age. In middle school, my friends and their parents would ask me to cook food for them because I could make something out of nothing. I love to cook up new concoctions and see what everyone likes. When I became of working age, I started as a buss boy at a barbecue restaurant, and then moved on to work all positions of the restaurant industry. From head chef of a Jamaican restaurant in Tulsa, OK, to sous chef at a highly accredited bistro on the Oregon coast, all before I turned 21.
I Inherited land in southeast Oklahoma and now spend my days working a Fedex delivery route and working with my wife and 3 young boys on our rural homestead. We raise many different kinds of animals and some vegetable gardens. I hunt all manor of large and small game, and butcher all of my own meat. We harvest wild edibles of all kinds and enjoy to cook with them and eat them.
I am grateful that you stopped by to see how we are doing and hope to see you again very soon. We would love to be friends and hope you enjoy all of the recipes and information that I can manage to put out.
Thank you, and much love!
-Eligh
I may receive a small commission for items purchased through affiliate links in this post at no additional cost to you.
- Homemade Remedy for Arthritis: Ginger Poultice - January 21, 2025
- THE WORLD FAMOUS SMELT FISH - January 9, 2025
- GROWING CORIANDER FROM SEED - December 10, 2024


KitchenAid KSM3311XAQ Artisan Mini Series Tilt-Head Stand Mixer, 3.5 quart, Aqua Sky Blue
(as of April 27, 2026 05:03 GMT -05:00 - More infoProduct prices and availability are accurate as of the date/time indicated and are subject to change. Any price and availability information displayed on [relevant Amazon Site(s), as applicable] at the time of purchase will apply to the purchase of this product.)


KitchenAid Artisan Series 5 Quart Tilt Head Stand Mixer with Pouring Shield KSM150PS, Matcha
(as of April 27, 2026 08:00 GMT -05:00 - More infoProduct prices and availability are accurate as of the date/time indicated and are subject to change. Any price and availability information displayed on [relevant Amazon Site(s), as applicable] at the time of purchase will apply to the purchase of this product.)


Instant Pot, 6-Quart Whisper Quiet 9-in-1 Electric Pressure Cooker, Slow Rice Steamer, Sauté, Yogurt Maker, Warmer & Sterilizer, Free App with 800+ Recipes, Stainless Steel
(as of April 27, 2026 05:03 GMT -05:00 - More infoProduct prices and availability are accurate as of the date/time indicated and are subject to change. Any price and availability information displayed on [relevant Amazon Site(s), as applicable] at the time of purchase will apply to the purchase of this product.)Auto Amazon Links: No products found.


IMUSA USA Granite Molcajete Spice Grinder 6-Inch, Gray
(as of April 27, 2026 09:54 GMT -05:00 - More infoProduct prices and availability are accurate as of the date/time indicated and are subject to change. Any price and availability information displayed on [relevant Amazon Site(s), as applicable] at the time of purchase will apply to the purchase of this product.)
Nut Milk Bags, All Natural Cheesecloth Bags, 12"x12", 2 Pack, 100% Unbleached Cotton Cloth Bags for Tea/Yogurt/Juice/Wine/Soup/Herbs, Durable Washable Reusable Almond Milk Strainer(Weave 66x70)
(as of April 26, 2026 23:51 GMT -05:00 - More infoProduct prices and availability are accurate as of the date/time indicated and are subject to change. Any price and availability information displayed on [relevant Amazon Site(s), as applicable] at the time of purchase will apply to the purchase of this product.)


Genuine Handmade Mexican Mortar and Pestle Set- 8 Inches, Molcajete Mexicano — Mexican Cookware Perfect as Salsa Bowls, Guacamole Bowl and Masher, Mortero Para Cocina made from Volcanic Rock in Mexico
(as of April 27, 2026 09:54 GMT -05:00 - More infoProduct prices and availability are accurate as of the date/time indicated and are subject to change. Any price and availability information displayed on [relevant Amazon Site(s), as applicable] at the time of purchase will apply to the purchase of this product.)


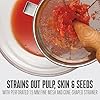
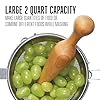

Weston Stainless Steel Cone and Pestle Set (83-3030-W), 2 Quart Capacity, Dishwasher Safe, 1.9-Liter, Silver
(as of April 27, 2026 09:54 GMT -05:00 - More infoProduct prices and availability are accurate as of the date/time indicated and are subject to change. Any price and availability information displayed on [relevant Amazon Site(s), as applicable] at the time of purchase will apply to the purchase of this product.)


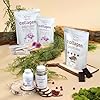
Micro Ingredients Multi Collagen Peptides Powder, 1lb – Hydrolyzed Type I,II,III,V,X with Biotin, Hyaluronic Acid, Vitamin C – Unflavored Collagen for Women & Men, Easy Dissolve, 41 Servings
(as of April 27, 2026 09:54 GMT -05:00 - More infoProduct prices and availability are accurate as of the date/time indicated and are subject to change. Any price and availability information displayed on [relevant Amazon Site(s), as applicable] at the time of purchase will apply to the purchase of this product.)


How to Make Apple Cider Vinegar: EASY TO FOLLOW | The Good Old Way
Monday 26th of February 2024
[…] HOW TO PLANT A FRUIT TREE […]