When I make almond milk at home, I control what goes into it. It’s as simple as soaking almonds, blending them with water, and straining. No preservatives, just pure goodness.
Plus, making it myself saves money and lets me adjust the sweetness to my taste. It’s a small effort for a big reward – a delicious and wholesome drink that starts my day off perfectly.

I love almond milk because it’s easy on my stomach and makes me feel nourished. It’s a simple pleasure that brings joy to my mornings and reminds me to appreciate the little things in life.
So, here’s to almond milk – my daily dose of comfort and happiness. It may be just a drink, but to me, it’s a symbol of gratitude and contentment.
Table of Contents

EQUIPMENT NEEDED
VITAMIX (BUY ON AMAZON)
I might receive a small commission for items purchased through affiliate links in this post at no additional cost to you.
INGREDIENTS
- 1 cup of raw almonds (let’s give them a warm hug)
- 4 cups of filtered water (pure and refreshing)
- Optional: a touch of sweetness like honey, maple syrup, or dates (for that extra sweetness in life)
- Optional: a sprinkle of flavorings such as vanilla extract or cocoa powder (to add a little magic)
INSTRUCTIONS
- Soak the almonds: Before we begin, let’s show our almonds some TLC. Place them in a bowl and cover them with water. Let them soak overnight or for at least 8 hours. This gentle soak will make them soft and ready to blend.
- Remove the skins (optional but recommended): After soaking, you can easily slip off the almond skins by gently pinching them between your fingers. This step is optional but can result in a smoother texture for your almond milk.
- Drain and rinse the almonds: After removing the skins, drain the almonds and give them a nice rinse under cold water. They’re all refreshed and ready for the next step.
START BLENDING
- Blend with water: Now, let’s bring out the stars of our show – the almonds and the water. Place them together in your Vitamix blender. If you want a thicker texture, you can reduce the water just a tad.
- Add sweeteners or flavorings (optional): If you fancy a little sweetness or flavor in your almond milk, now’s the time to add it. A spoonful of honey or a splash of vanilla can truly elevate the experience.
- Blend until smooth: Let’s give our almond and water duo a whirl! Start blending on low speed, gradually increasing to high speed. Let them dance together for about 1-2 minutes until they become one creamy mixture.
- Store and refrigerate: Our almond milk is now ready for its cozy home in the refrigerator. Pour it into a clean container, seal it with love, and pop it in the fridge. Remember, homemade almond milk is best enjoyed within 3-4 days. Don’t forget to give it a little shake before pouring, as natural separation may occur.
- Optional: Save the almond pulp: Don’t let anything go to waste! The leftover almond pulp can be dried and used in baking or added to oatmeal for an extra boost of fiber and nutrients
SOAK YOUR ALMONDS

- Soak the almonds: Before we begin, let’s show our almonds some TLC. Place them in a bowl and cover them with water. Let them soak overnight or for at least 8 hours. This gentle soak will make them soft and ready to blend.

- Remove the skins (optional but recommended): After soaking, you can easily slip off the almond skins by gently pinching them between your fingers. This step is optional but can result in a smoother texture for your almond milk.

- Drain and rinse the almonds: After removing the skins, drain the almonds and give them a nice rinse under cold water. They’re all refreshed and ready for the next step.

BLEND
- Blend with water: Now, let’s bring out the stars of our show – the almonds and the water. Place them together in your Vitamix blender. If you want a thicker texture, you can reduce the water just a tad.


- Add sweeteners or flavorings (optional): If you fancy a little sweetness or flavor in your almond milk, now’s the time to add it. A spoonful of honey or a splash of vanilla can truly elevate the experience.
- Blend until smooth: Let’s give our almond and water duo a whirl! Start blending on low speed, gradually increasing to high speed. Let them dance together for about 1-2 minutes until they become one creamy mixture

- Store and refrigerate: Our almond milk is now ready for its cozy home in the refrigerator. Pour it into a clean container, seal it with love, and pop it in the fridge. Remember, homemade almond milk is best enjoyed within 3-4 days. Don’t forget to give it a little shake before pouring, as natural separation may occur.

Ah, almond pulp – the leftover treasure from homemade almond milk! Don’t toss it aside just yet, because it’s packed with potential.
- Transform it into almond flour by drying and grinding it. Perfect for gluten-free baking!
- Roll it into energy balls with dates and nut butter for a quick, nutritious snack.
- Add it to smoothies for extra fiber and creaminess.
- Mix it into homemade crackers for a tasty crunch.
- Pamper yourself with a DIY face scrub or mask.
benefits found in almond pulp:
- Fiber: Supports digestive health and helps with satiety.
- Protein: Aids in tissue repair and muscle maintenance.
- Vitamins and Minerals: Provides essential nutrients like vitamin E, magnesium, calcium, and iron.
- Healthy Fats: Contains beneficial monounsaturated fats for heart health.
- Antioxidants: Helps reduce oxidative stress and inflammation in the body.
- Low Glycemic Index: Has minimal impact on blood sugar levels, suitable for managing blood sugar.
If you don’t have a Vitamix blender
no worries! You can still make delicious almond milk with a regular blender. Here’s how:
- Soak the almonds: Just like with a Vitamix, start by soaking your almonds in water overnight or for at least 8 hours. This helps soften them up for blending.
- Blend with water: After soaking, drain and rinse the almonds, then add them to your regular blender along with the water. You might need to work in batches depending on the size of your blender.
- Blend until smooth: Blend the almonds and water on high speed until you get a smooth, creamy mixture. It might take a bit longer than with a Vitamix, so be patient and give it a good blend.
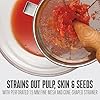
- Strain the almond milk: Once blended, pour the mixture through a nut milk bag or cheesecloth to strain out the pulp. Again, you might need to do this in batches.
- Store and enjoy: Transfer your freshly made almond milk to a clean container and store it in the fridge. Give it a good shake before using, as natural separation may occur.

If you have never laid eyes on a chanterelle mushroom before, this new endeavor might be slightly intimidating to you. Read more

These Easy Fire Starters are made with common household items that you normally throw away! Just 3 materials you need Read more

Baked Brie is a wonderful way to start or finish a meal! Great for holidays or family get togethers, anyone Read more

Homemade lard is a traditional way of taking fat and turning it into a very diverse and useful ingredient. Use Read more
I started cooking at a very young age. In middle school, my friends and their parents would ask me to cook food for them because I could make something out of nothing. I love to cook up new concoctions and see what everyone likes. When I became of working age, I started as a buss boy at a barbecue restaurant, and then moved on to work all positions of the restaurant industry. From head chef of a Jamaican restaurant in Tulsa, OK, to sous chef at a highly accredited bistro on the Oregon coast, all before I turned 21.
I Inherited land in southeast Oklahoma and now spend my days working a Fedex delivery route and working with my wife and 3 young boys on our rural homestead. We raise many different kinds of animals and some vegetable gardens. I hunt all manor of large and small game, and butcher all of my own meat. We harvest wild edibles of all kinds and enjoy to cook with them and eat them.
I am grateful that you stopped by to see how we are doing and hope to see you again very soon. We would love to be friends and hope you enjoy all of the recipes and information that I can manage to put out.
Thank you, and much love!
-Eligh
I may receive a small commission for items purchased through affiliate links in this post at no additional cost to you.
- Homemade Remedy for Arthritis: Ginger Poultice - January 21, 2025
- THE WORLD FAMOUS SMELT FISH - January 9, 2025
- GROWING CORIANDER FROM SEED - December 10, 2024


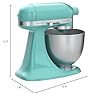
KitchenAid KSM3311XAQ Artisan Mini Series Tilt-Head Stand Mixer, 3.5 quart, Aqua Sky Blue
(as of March 31, 2026 18:03 GMT -05:00 - More infoProduct prices and availability are accurate as of the date/time indicated and are subject to change. Any price and availability information displayed on [relevant Amazon Site(s), as applicable] at the time of purchase will apply to the purchase of this product.)


KitchenAid Artisan Series 5 Quart Tilt Head Stand Mixer with Pouring Shield KSM150PS, Matcha
(as of March 31, 2026 17:25 GMT -05:00 - More infoProduct prices and availability are accurate as of the date/time indicated and are subject to change. Any price and availability information displayed on [relevant Amazon Site(s), as applicable] at the time of purchase will apply to the purchase of this product.)


Instant Pot, 6-Quart Whisper Quiet 9-in-1 Electric Pressure Cooker, Slow Rice Steamer, Sauté, Yogurt Maker, Warmer & Sterilizer, Free App with 800+ Recipes, Stainless Steel
(as of March 31, 2026 18:46 GMT -05:00 - More infoProduct prices and availability are accurate as of the date/time indicated and are subject to change. Any price and availability information displayed on [relevant Amazon Site(s), as applicable] at the time of purchase will apply to the purchase of this product.)Auto Amazon Links: No products found.


IMUSA USA Granite Molcajete Spice Grinder 6-Inch, Gray
(as of March 31, 2026 18:03 GMT -05:00 - More infoProduct prices and availability are accurate as of the date/time indicated and are subject to change. Any price and availability information displayed on [relevant Amazon Site(s), as applicable] at the time of purchase will apply to the purchase of this product.)
Nut Milk Bags, All Natural Cheesecloth Bags, 12"x12", 2 Pack, 100% Unbleached Cotton Cloth Bags for Tea/Yogurt/Juice/Wine/Soup/Herbs, Durable Washable Reusable Almond Milk Strainer(Weave 66x70)
(as of March 31, 2026 15:39 GMT -05:00 - More infoProduct prices and availability are accurate as of the date/time indicated and are subject to change. Any price and availability information displayed on [relevant Amazon Site(s), as applicable] at the time of purchase will apply to the purchase of this product.)
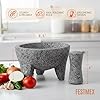


Genuine Handmade Mexican Mortar and Pestle Set- 8 Inches, Molcajete Mexicano — Mexican Cookware Perfect as Salsa Bowls, Guacamole Bowl and Masher, Mortero Para Cocina made from Volcanic Rock in Mexico
(as of March 31, 2026 18:28 GMT -05:00 - More infoProduct prices and availability are accurate as of the date/time indicated and are subject to change. Any price and availability information displayed on [relevant Amazon Site(s), as applicable] at the time of purchase will apply to the purchase of this product.)
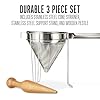
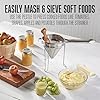

Weston Stainless Steel Cone and Pestle Set (83-3030-W), 2 Quart Capacity, Dishwasher Safe, 1.9-Liter, Silver
(as of March 31, 2026 19:49 GMT -05:00 - More infoProduct prices and availability are accurate as of the date/time indicated and are subject to change. Any price and availability information displayed on [relevant Amazon Site(s), as applicable] at the time of purchase will apply to the purchase of this product.)


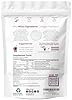
Micro Ingredients Multi Collagen Peptides Powder, 1lb – Hydrolyzed Type I,II,III,V,X with Biotin, Hyaluronic Acid, Vitamin C – Unflavored Collagen for Women & Men, Easy Dissolve, 41 Servings
(as of March 31, 2026 15:29 GMT -05:00 - More infoProduct prices and availability are accurate as of the date/time indicated and are subject to change. Any price and availability information displayed on [relevant Amazon Site(s), as applicable] at the time of purchase will apply to the purchase of this product.)